Before starting these tutorials ensure that you have basic knowledge of Arduino and electronic components such as resistors, capacitors and diodes. If you need to brush up on these you can download the Arduino Starter book from here. This book will give you basic information on Ohms Law, how to read schematics and what certain components do. You don’t need to complete the tutorials just read the first few pages.
If you want to complete the projects from the book, the kit can be purchased directly from the Arduino Store.
Schematic Conventions
Schematic diagrams are logical representations of electronic circuits, they don’t show the physical layout of the circuit. All of the tutorials will have a video and images to accompany them showing you the physical layout of each circuit as well as a schematic.
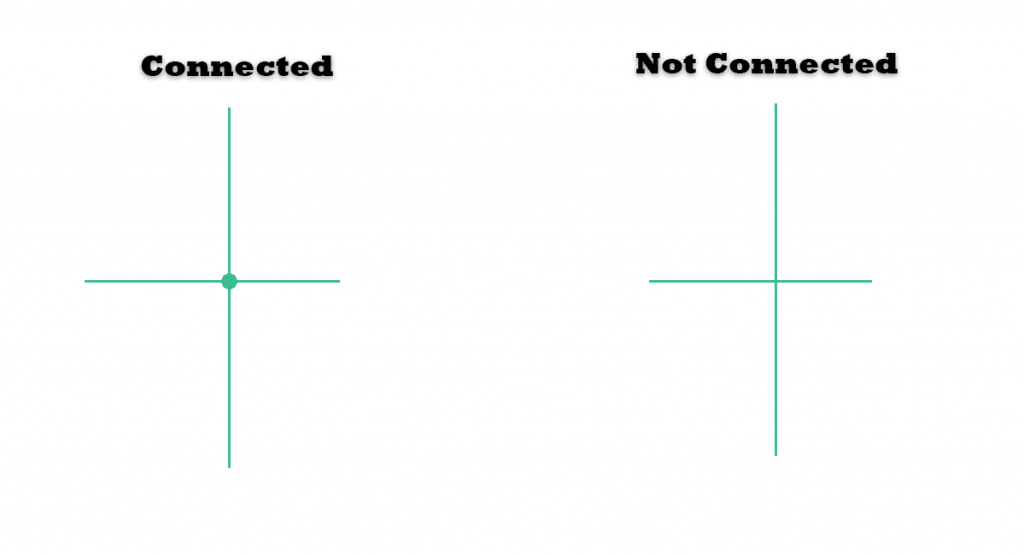
The below diagram shows how interconnections will be shown on the schematic diagrams. Crossed wires are not connected unless there is a node where the connection is (This is different to the Arduino book, the below diagram shows how I will show connected wires).
Battery Board
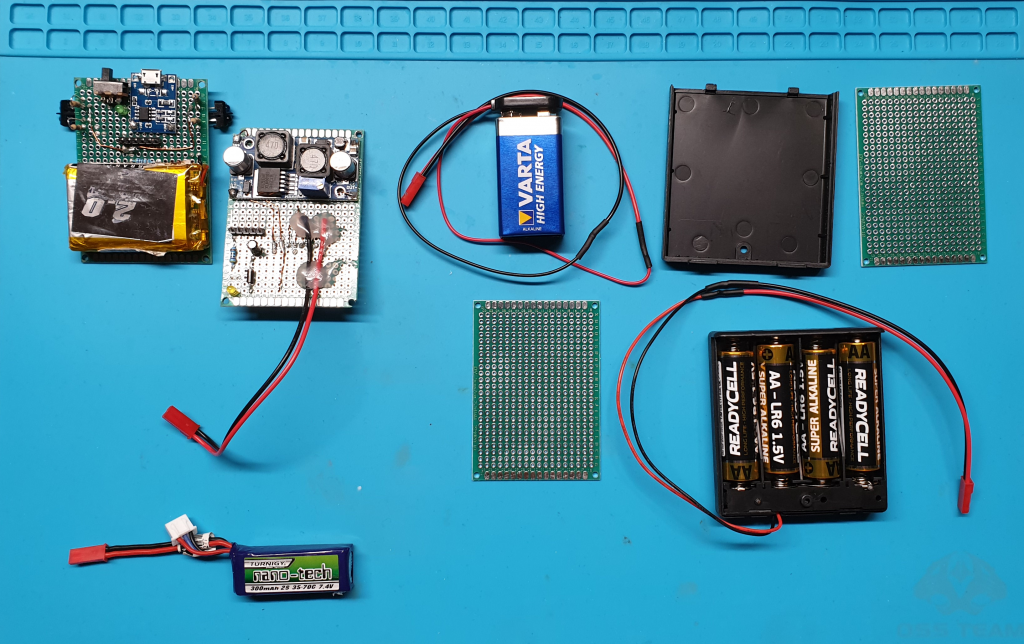
The battery board tutorial is optional however I recommend that it is completed as it will allow you to gather odometry data from the wheels and battery voltage information. If you want MIPR up and running as fast as possible and you don’t care about odometry data you can power MIPR using off the shelf batteries. I have given you 4 power options below;
- Battery Board as per the Battery Board Tutorial.
- 4 AA Batteries.
- 2 or 3S LIPO
- 9V battery.
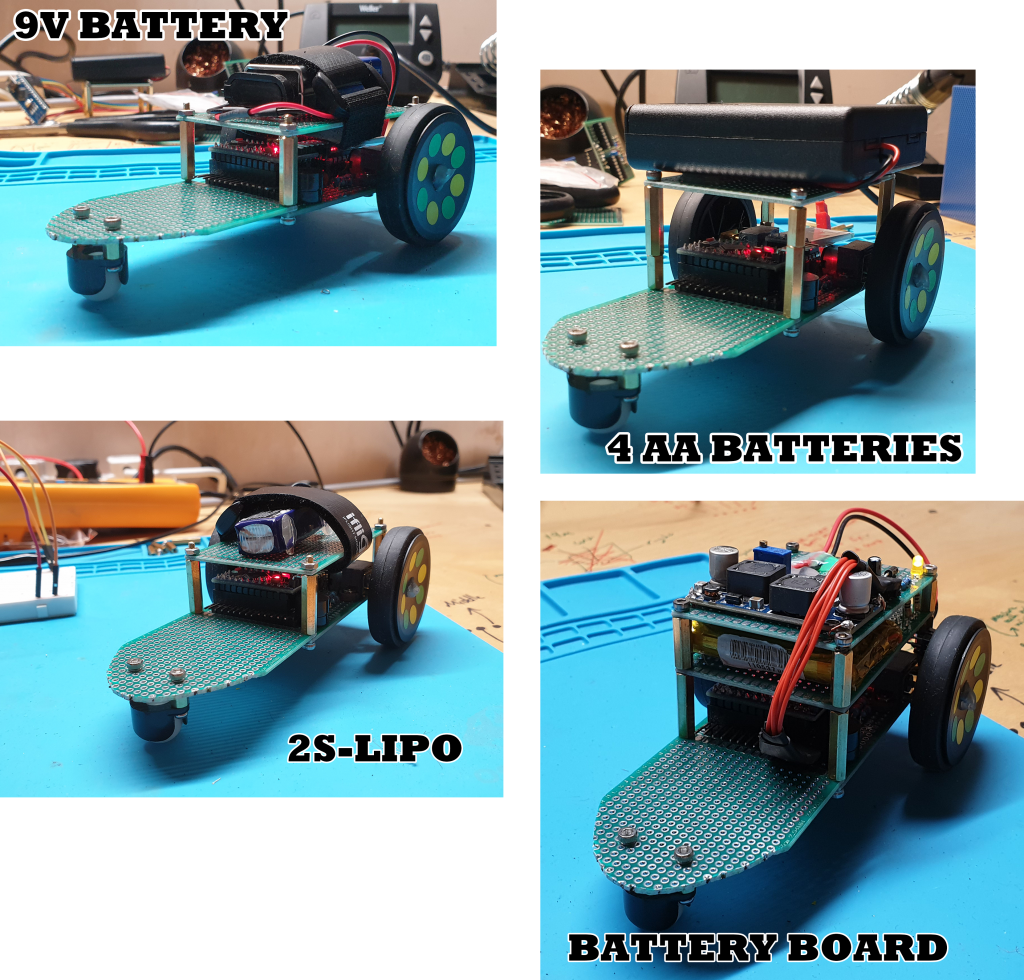
The optimum solution is to use the battery board however if you want to get MIPR up and running quickly and you don’t have any LiPo batteries spare the second best solution is to use a 9v battery. If you use 4 AA batteries then MIPR’s speed will be decreased as these will only provide 6V to the motors. I have added pictures to show what the robot will look like using the different solutions. These batteries can be mounted to perfboard using hot glue or Velcro straps then attached to MIPR using standoffs.
Bluetooth Programming
MIPR can be programmed over Bluetooth, to do this you will need to plug your HC-05 into a Bluetooth programmer and change some parameters. The tutorial on how to make a Bluetooth programmer can be viewed here. You can use the Arduino that you will use for MIPR to create the Bluetooth programmer. Once the HC-05’s parameters have been changed you can reuse the Arduino as MIPR’s brain.
If you choose not to use the HC-05 to program MIPR you will have to change the baud rate in the example programs to 9600. I will set the baud rate to 57600 as this is the baud rate of the Arduinos bootloader, this will allow us to program MIPR over Bluetooth.
Soldering
In order to make MIPR and it’s senor boards you will have to solder. Ensure that you know the basics of soldering before starting and make sure that you solder in a well ventilated area or have an extractor fan at hand. Solder fumes can be very dangerous if inhaled on a regular basis.
Code
MIPR’s code will change from time to time so ensure that your using the correct version for the tutorial that you’re doing. The main reason for this is to keep the code as simple and readable as possible. As the tutorials progress the code will become more complex. I will explain how the code works however I wont be going into details about how to write code. You will need basic information regarding syntax and data types before starting these tutorials.
MIPR Framework
Once all of the example tutorials are completed I will create a MIPR framework that will be a library that you can import into your project. This will keep the code hidden and make it easier to use. I will include examples with the library so you can see how to use it. With this you will be able to use MIPR and it’s framework for any future small scale robotic projects.
MIPR is a simple robot that will give you a good introduction to robotics. We use an Arduino as the robots brain and as a result we’re limited to what it can do. In a later tutorial we will expand MIPR using a Tensy 3.2 micro-controller. This will enable us to experiment with complex ideas such as neural networks.
Blank Sensor Board
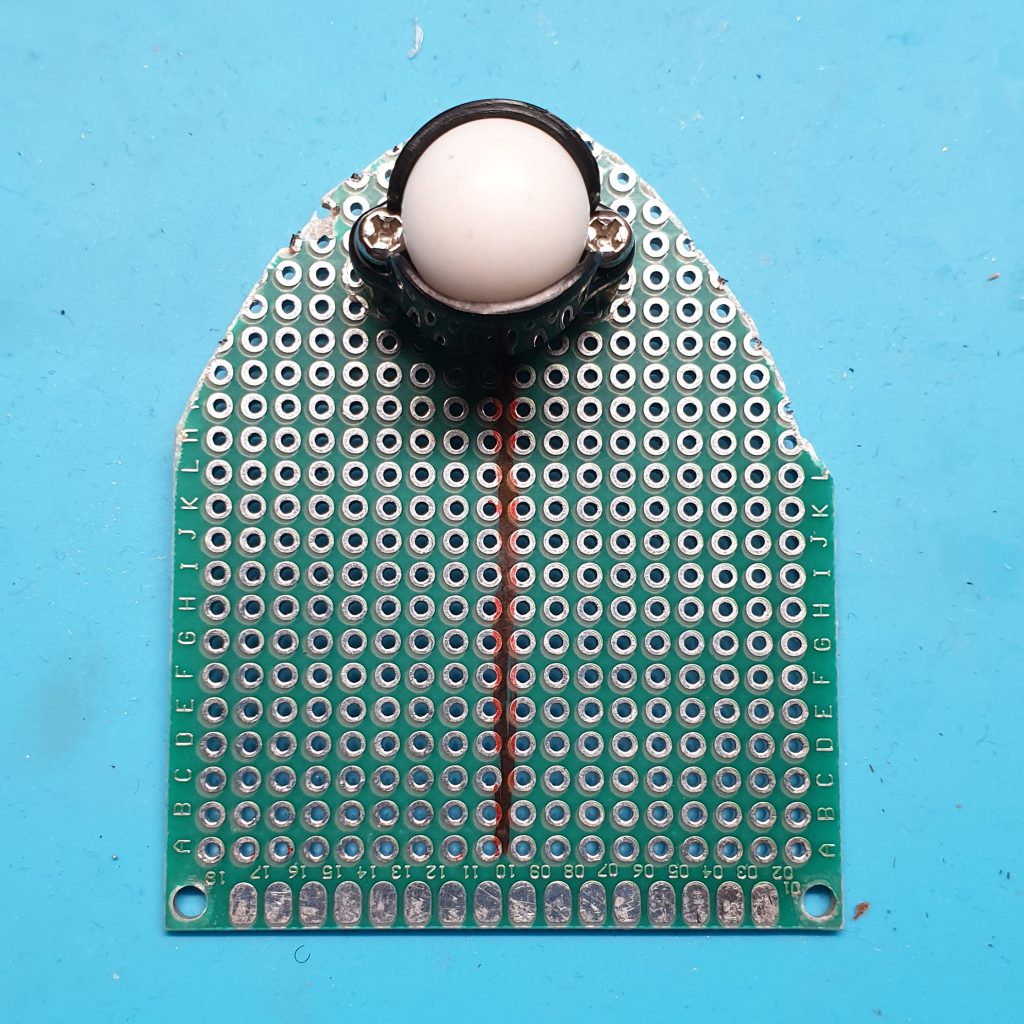
From time to time you will see my version of MIPR with a blank sensor board. I use this when I don’t need extra functionality provided by the sensor boards. To make this I used another piece of perf board, drilled some holes in it for the castor wheel and rounded off the front edge with some scissors. You then attach it to MIPR using the 2 front screws that the battery board standoffs are attached to. I have added a picture below;
Mistakes
When making things such as MIPR it is very easy to make mistakes and wire the wrong pin to the wrong component. I made many mistakes when making these videos and to show you that these happen I have left them in the tutorial videos and shown how they were corrected. The tutorial videos are designed to be used with the website, I would recommend that you watch each tutorial video before starting then watch them as you make your version of MIPR.
Telemetry.jar
Telemetry.jar is a great application that displays telemetry from MIPR. I will be using this throughout these tutorials and in order for this to work you must have the latest version of Java installed. This application can sometimes hang when trying to connect to MIPR. If this happens the best thing to do is to close the application through Task Manager, reopen and try again.#
Github
I use GitHub to host the code used in these tutorials. When using the code from GitHub go to the MIPR GitHub page and click on the “clone or download” button. Once this is done download the code in zip format, then unzip the code and it will be ready to use. Ensure that you are using the correct code version for each tutorial.