Neopixels are great for projects that require full colour LED’s, they’re easy to connect and to program. This tutorial will show you how to connect 2 Neopixels to an Arduino micro-controller with example code demonstrating how to setup the Neopixels and change their colour.
The below diagram shows the pinout of a 5mm and 8mm Neopixel;
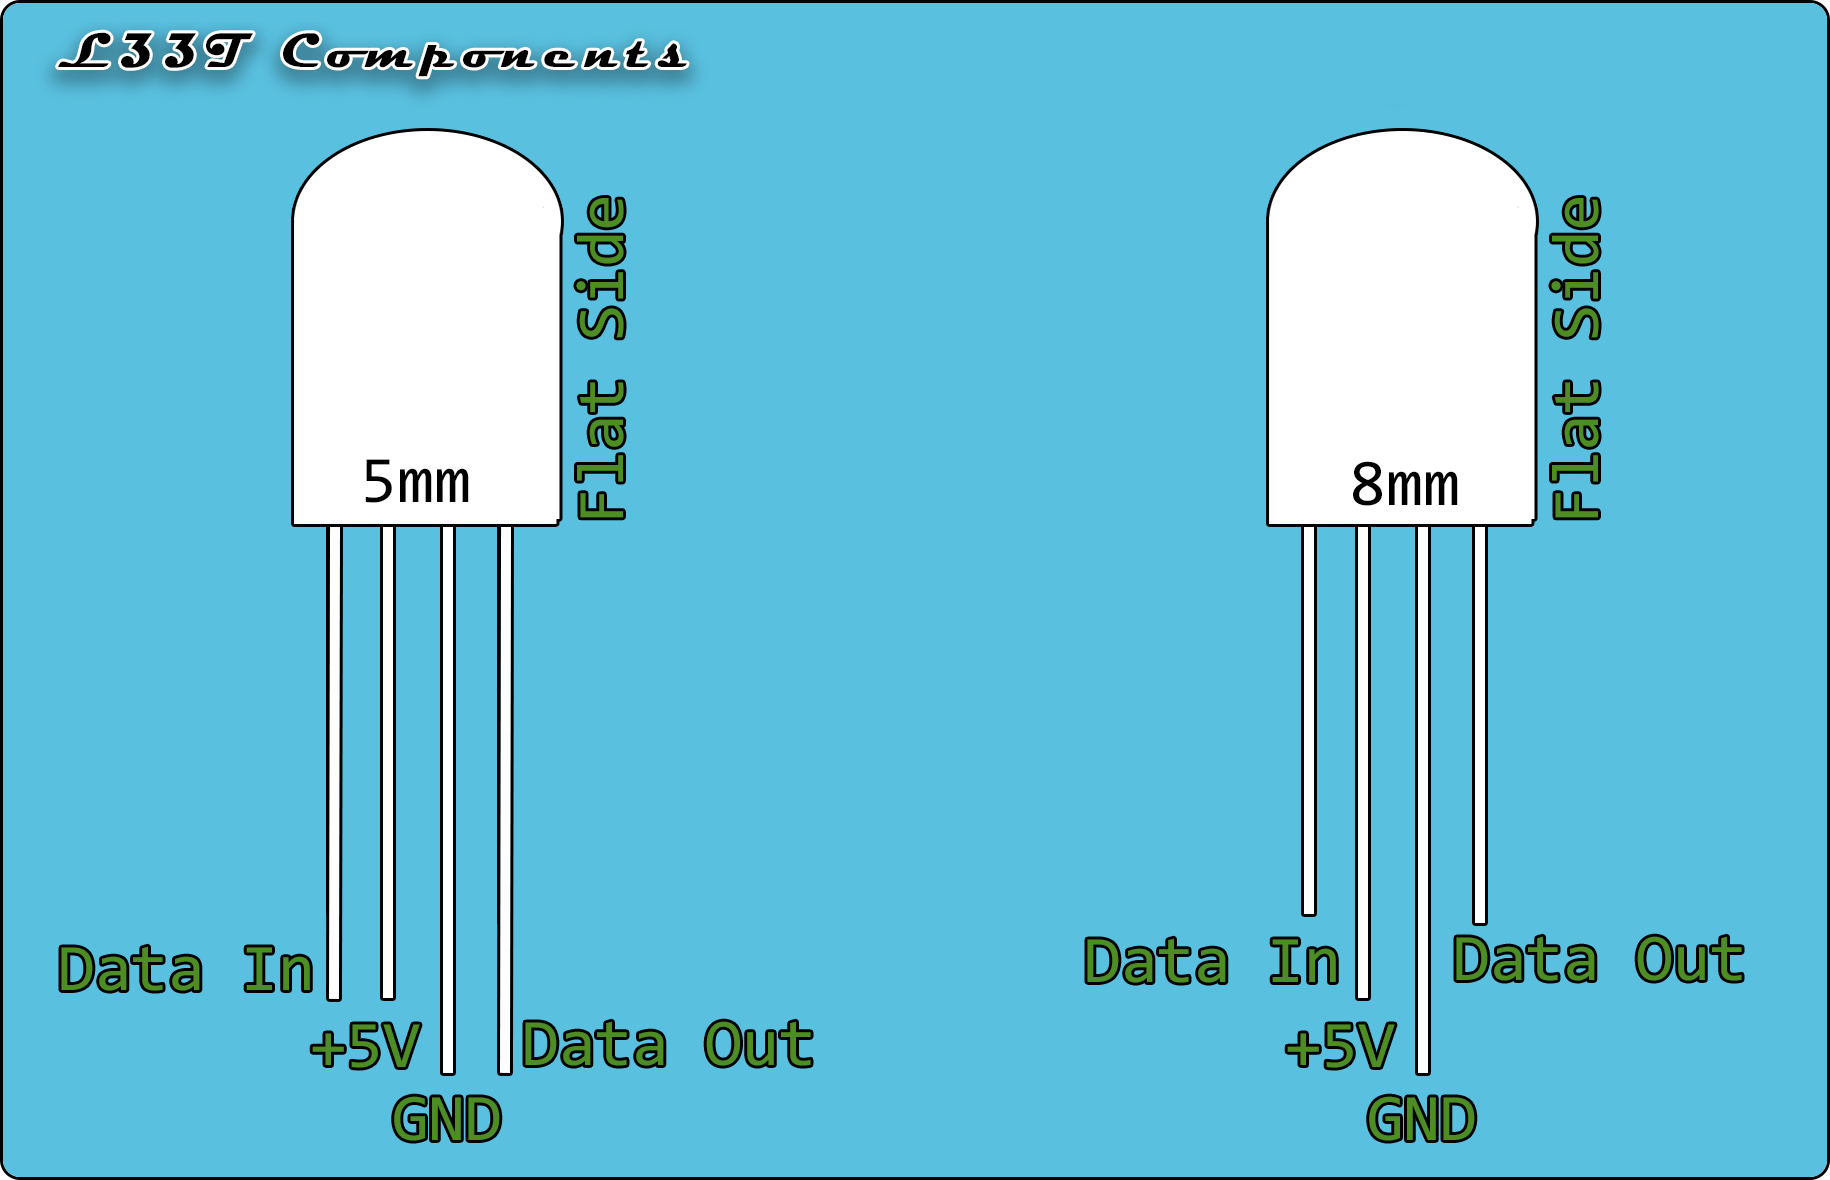
In order to get these working we need to provide them with power, ground and a data signal. Be sure to use the same voltage for both the signal and power; for instance if your using a 3.3v micro-controller ensure that you power the Neopixels with 3.3v instead of 5v and vice versa. If you don’t do this the Nexopixels could behave erratically.
The below diagram shows how the Nexopixels are connected to the Arduino;
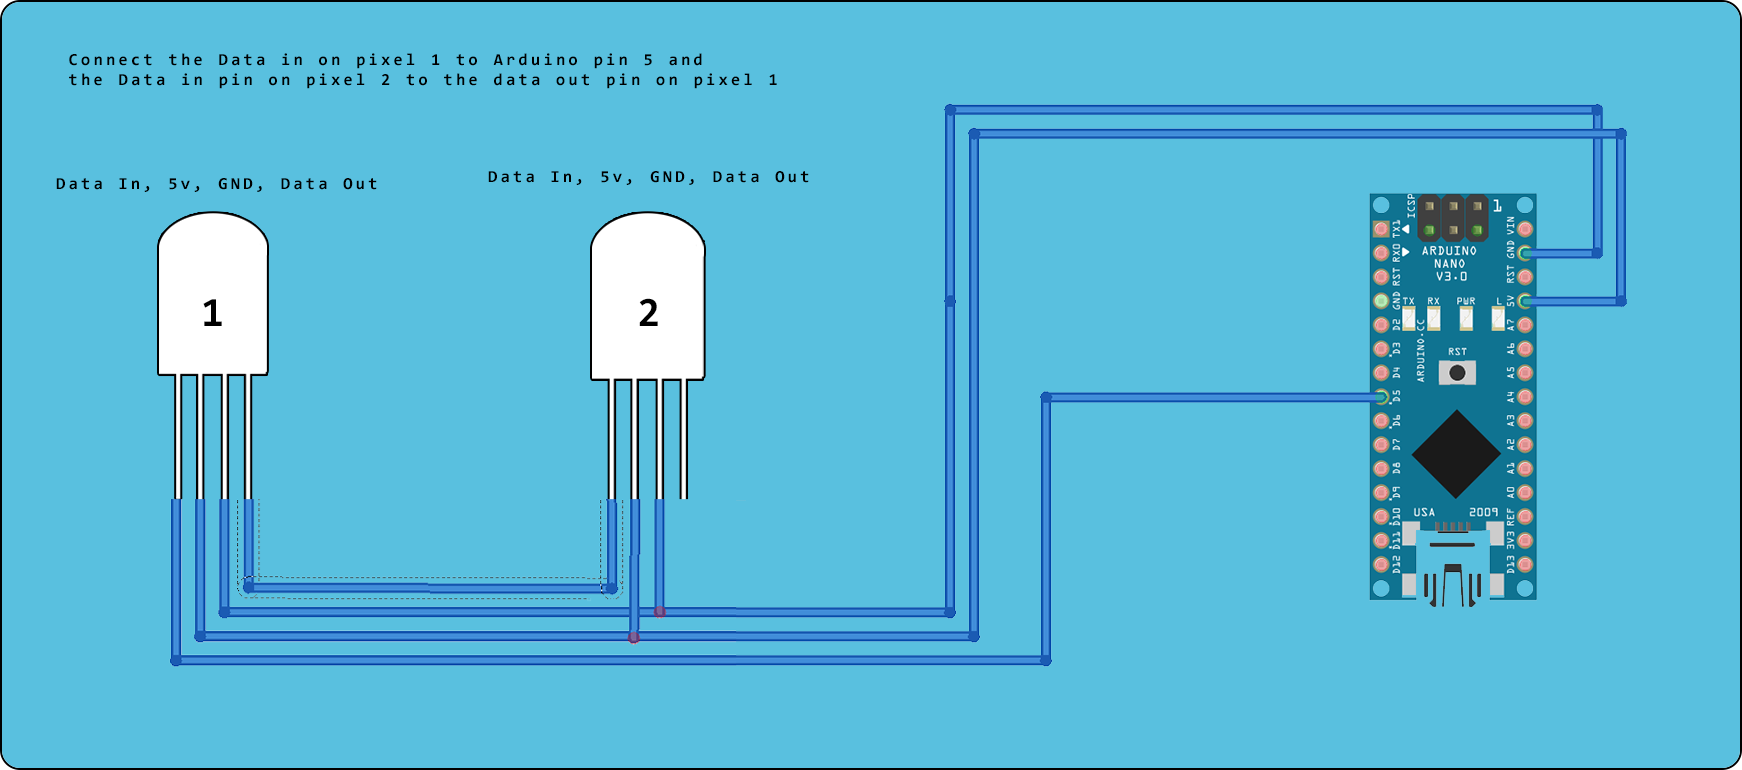
You could add a current limiting resistor to the Neopixels power pin if you want to protect them from power spikes. I’ve not done this because we only have 2 Neopixels in the circuit and they’re powered from the Arduino’s 5v pin that is already stable. If you use a different power supply or have more Nexopixels connected in series I would advise that a current limiting resistor is used. You can use Ohms law V = IR to calculate this value where each Neopixel will draw a maximum of 50mA.
Once the circuit is made you will need to download a Neopixel library. The Adafruit library is comprehensive and can be downloaded from Git Hub. Follow the link and click “clone or download”, then download the Zip file. once the file has downloaded go into Arduino IDE and follow the below menu selections;
Sketch -> Include Library -> Add .Zip Library
Select the zip file that you downloaded from Git Hub and press OK. This will install the library.
The below code can be uploaded to your micro-controller, it will make the Neopixels change colour every 500mS.
This code can be altered to make the Neopixels behave differently, for more code examples use the examples included in the Adafruit Neopixel Library. When using other examples ensure that the Neopixel object is setup correctly by using the code on line 4;
You can add more Neopixels in series however if you do this be mindful of the current draw and be prepared to use an external power supply to power them if required. These LED’s draw around 50mA each so if you were to use an Arduino Nano you could attach around 20 Neopixels to the Nano’s 5V pin (Maximum current draw of 1 Amp).
You can buy these from our E-Bay shop where you will get the Neopixels and a quick reference card to help you program them. Click here for 8mm Neopixels and here for 5mm Neopixels.