Difficulty: Beginner
The HC-05 Bluetooth module is used to add Bluetooth capability to any Arduino project. The module can be integrated into any project without the need to add complicated code. I’ve been using these modules for a number of years to get remote telemetry from projects and to send commands without the need for wires. During this time I have wished that I could program my micro controller through the Bluetooth module however this isn’t possible with a HC-05 out of the box. The modification shown on this page will allow you to use the HC-05 to remotely program an Arduino micro controller. It’s easy to implement and can be added to any projects. For new projects you can add the circuit to your projects circuit board and for existing projects you can modify the HC-05 and connect the reset pin as shown below.
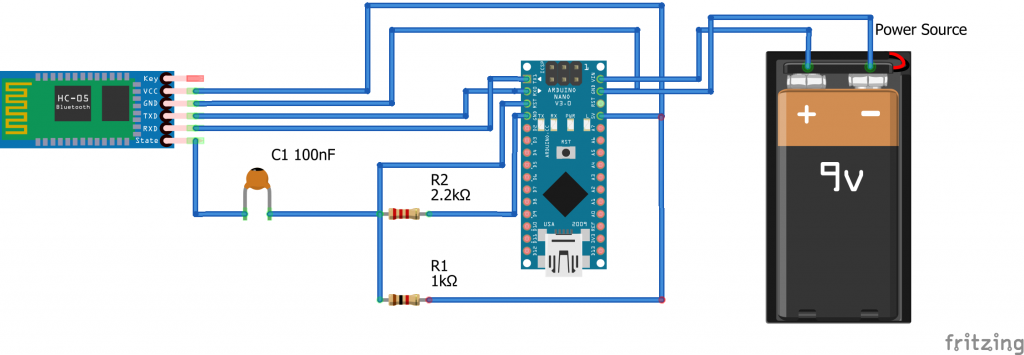
The below diagram is of the HC-05 modification;
I have also added a schematic of the circuit for clarity;
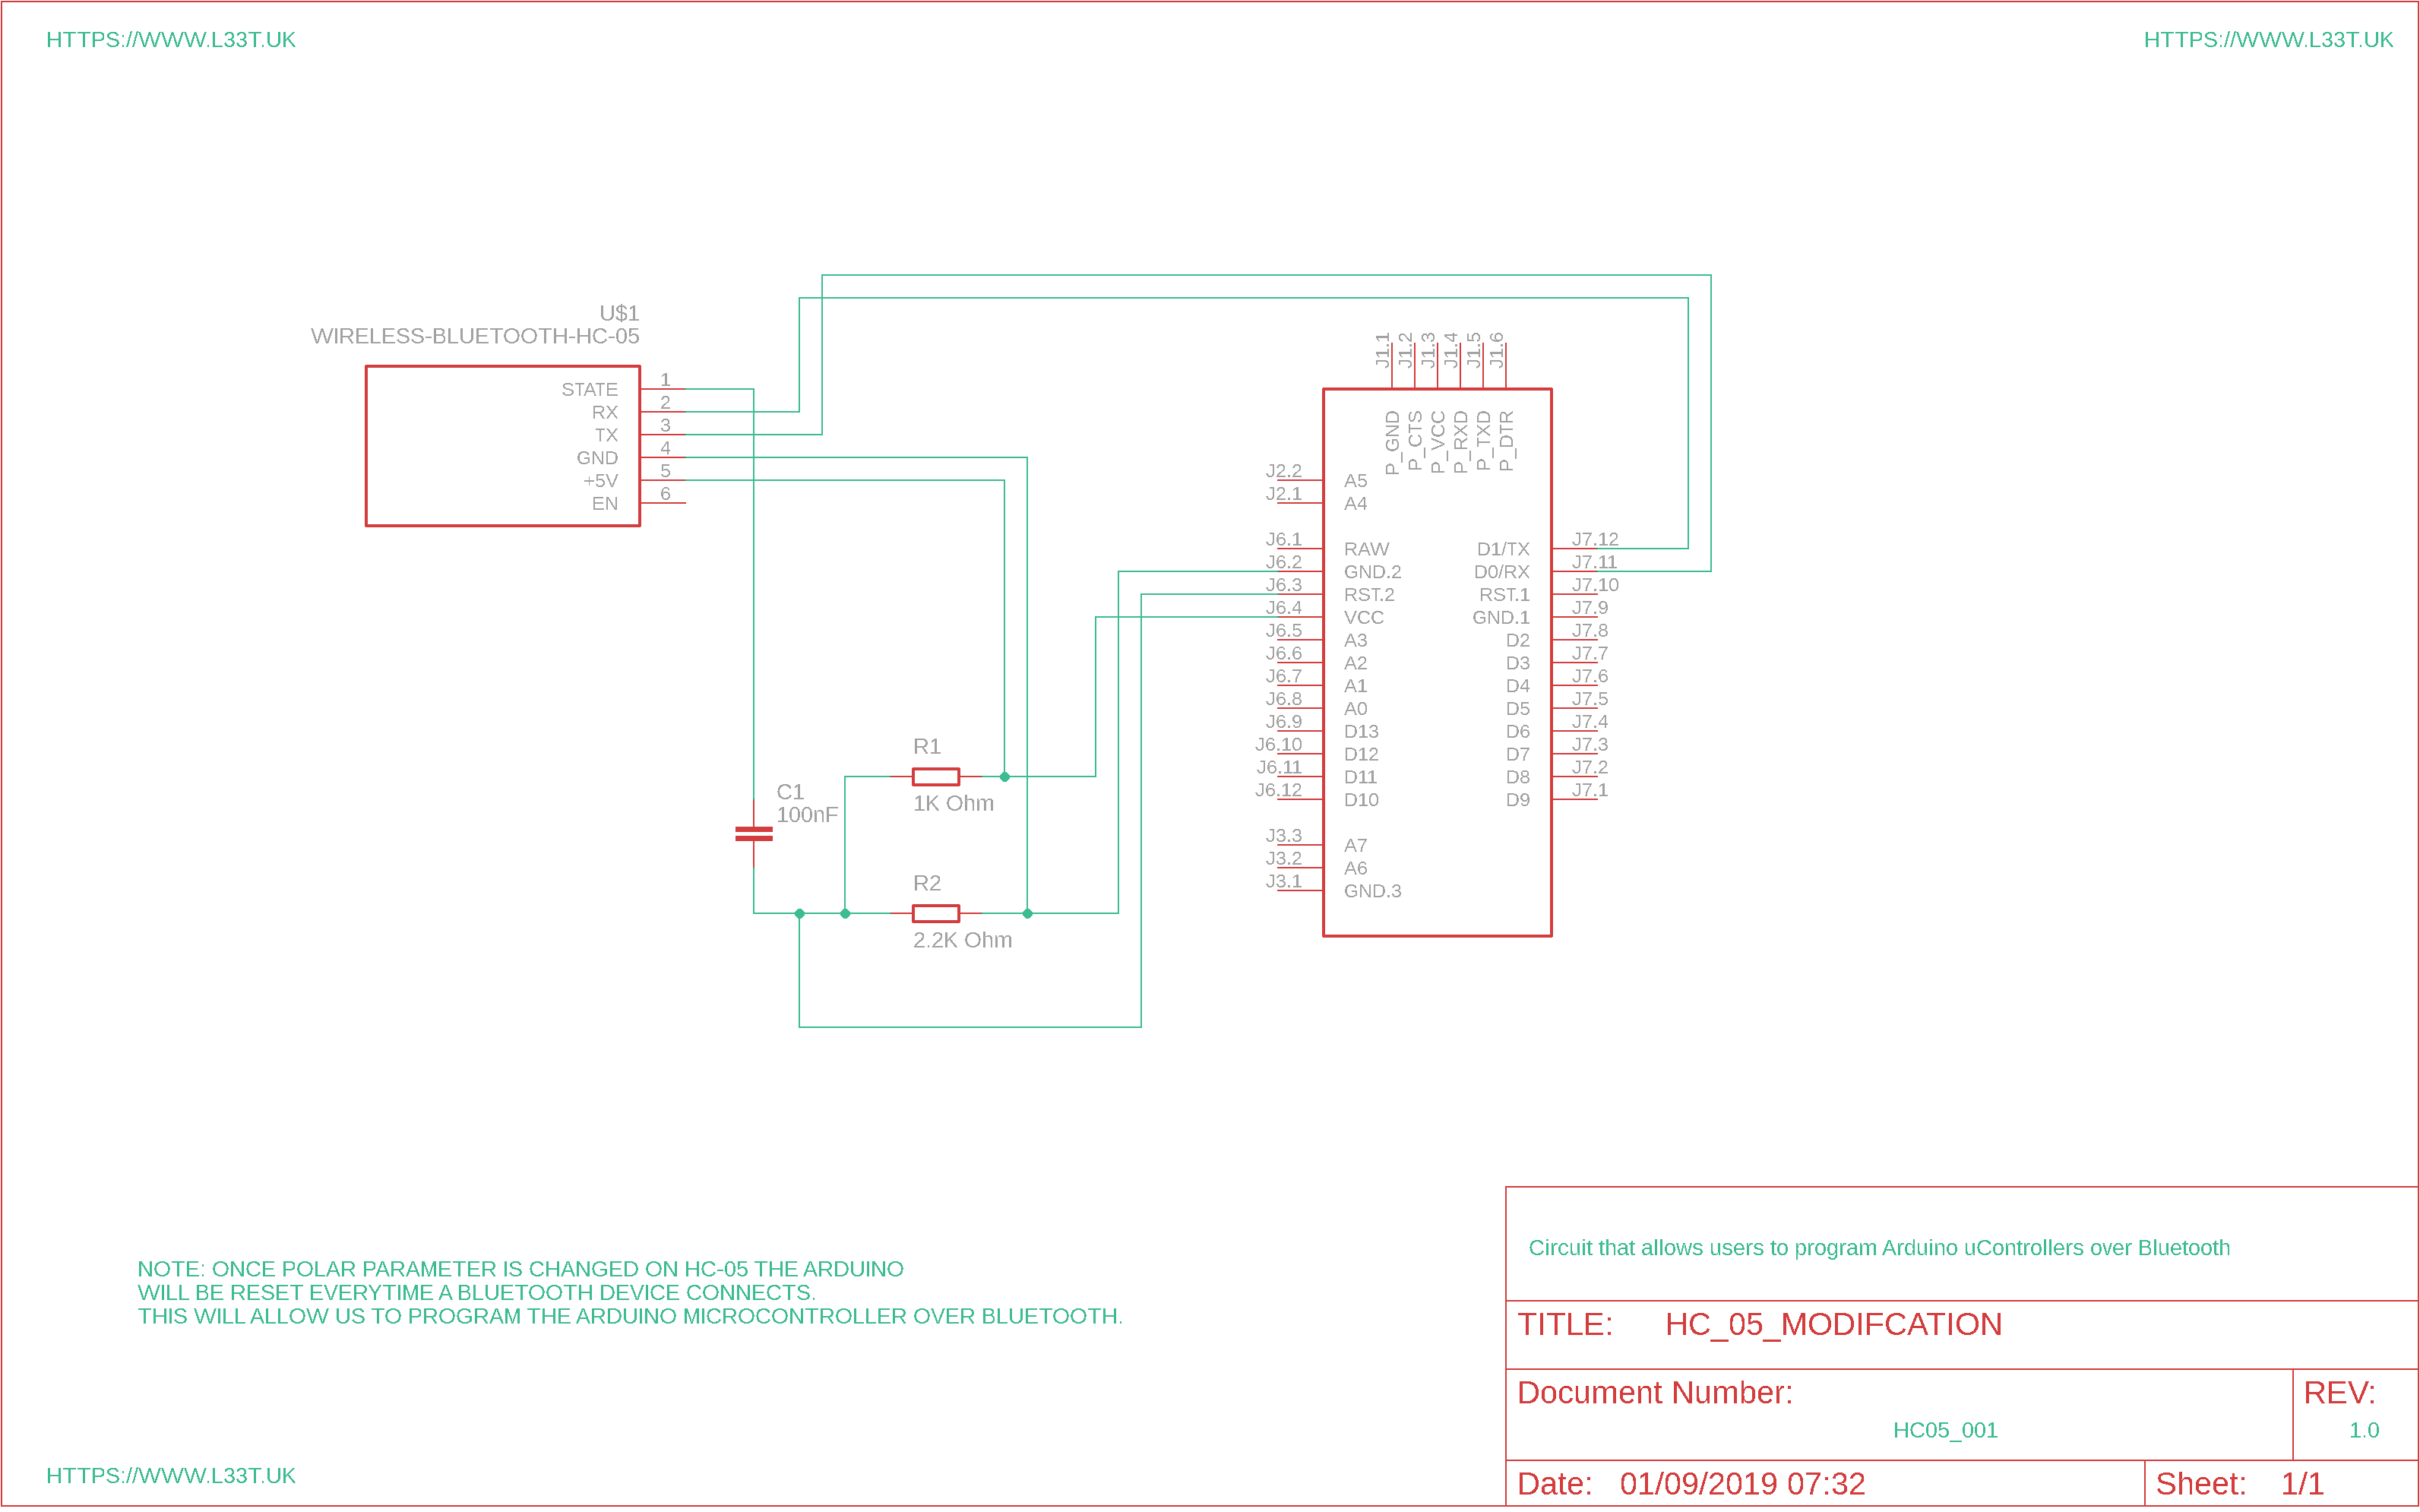
The above diagram shows how the TX/RX pins should be connected.
The diagram shows the STATE pin of the HC-05 being connected to the reset pin of the Arduino via a 100nF capacitor. When the STATE pin logic level goes from high to low (3.3V – 0V) their will be a potential difference going over the capacitor forcing it to charge up, puting a 0V pulse on the reset pin of the Arduino. Once the capacitor is recharged the 0V on the reset pin will be removed and because the capacitor is only 100nF the CR time is very quick. The voltage divider circuit is their to reduce the voltage on the reset pin. If this voltage is too high the reset function will not work. For this circuit to work the voltage on the reset pin must be reduced to less than 3.9V, it would usually sit around 4.4V- 5V.
Once the modification is created and added to the HC-05 you will need to connect the HC-05 to a programmer (see my tutorial here) and use AT commands to change the baud rate to the same baud rate as the bootloader in your micro controller (see this link to view baud rates for different micro controllers), this will be 57600 or 115200. Once the baud rate is changed the POLAR variable will need to be changed to reverse the logic on the state pin.
The commands to do this are;
or if your baud rate is 115200;
After each line is entered the serial monitor should return the string “OK”.
Below is a video showing you how to use AT commands in conjunction with a Bluetooth programmer.
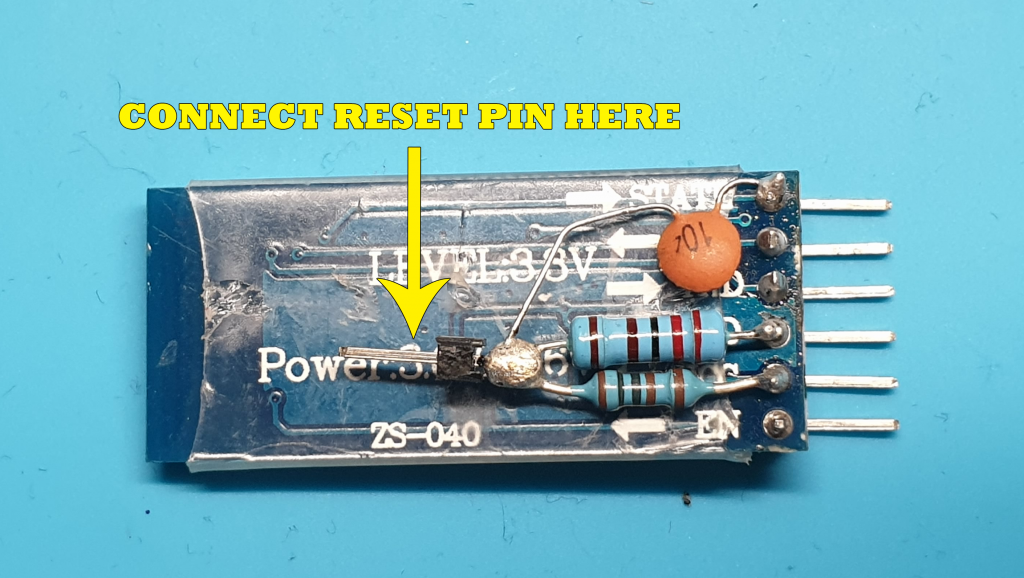
This is a picture of what the modification look like when its soldered directly onto a HC-05. You can also make this modification on a solder-less breadboard or as part of a circuit design.
When uploading code to your micro controller ensure that you have paired the HC-05 with your computer and that you select the correct comm port in Arduino IDE.
Please note that when a bluetooth connection is made with your HC-05 the Arduino will reset. This can’t be avoided with this design. If your going to use the HC-05 to send commands or receive telemetry remember to set the Serial baud to the same as your bootloader. For instance if you set the baud rate on the HC-05 to 57600 via the above AT commands, when you use the Serial.begin() line ensure that you type Serial.begin(57600);.
If you have made this modification and it doesn’t work as desired check your wiring and that you have the correct comm port selected in Arduino IDE. If all that seems fine try powering your Arduino via the VIN pin with a 3.7V battery. If it still doesn’t work then your wiring will be wrong. If it does work you need to use a multimeter to see what the voltage is at the reset pin with respect to ground if its above 4V change R2 with a larger valued resistor. You could install a 5K potentiometer and adjust the voltage until the voltage at the reset pin is around 3.6 when powered from USB or 3.9V when powered from VIN. This modification will work if the voltage at the reset pin is 3.9 – 1.7V, if it’s too low then the Arduino will constantly reset and if it’s too high then the Arduino wont reset when a BT connection is made. with the stock R2 value you should have between 2.5 – 3V at the reset pin which is ideal.