The HC-SR04 is a great sensor to detect objects or movement for an Arduino project. We can use it to detect objects in robotic projects, detect movement for light projects or even to measure distances. This tutorial will show you how to setup the HC-SR04 using the New Ping library and we will demonstrate some of its downsides and offer solutions to overcome these.
The benefits of using a HC-SR04 are;
- Cheap
- Easy to use
- Accurate (under good conditions)
- Fairly small
- Can be configured to use either 1 or 2 digital IO pins
- Lots of code examples on the internet
- Good introduction to using sensors
- Range of up to 4 meters
The disadvantages of using a HC-SR04 are;
- Blocks your code when taking a measurement; not good for real time systems
- Accuracy is decreased as the reflection angles increases
- Accuracy decreases with soft absorbent objects
This sensor uses ultrasonic sound of around 40Khz to detect objects, due to the high frequency this is highly directional in nature and the beamwidth is quite narrow. A downside to this is that if the angle of the detected object to too big the ultrasound will be scattered and measurement accuracy decreased. If your using these sensors for a robotics project I would recommend you make the robot turn at least 15 degrees before taking another measurement after an object is detected.
Creating the Circuit

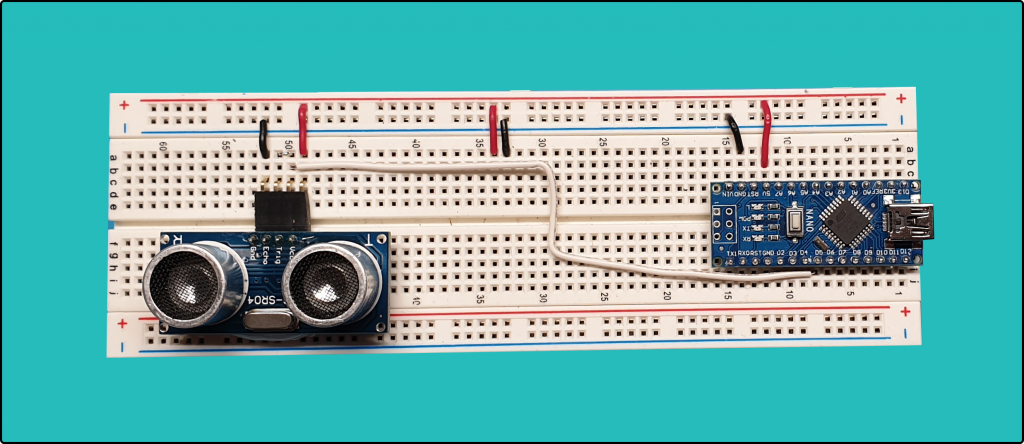
I have connected the echo and trig pin together in the above picture with a short piece of wire, you can barely see it.
Installing the NewPing Library
To install the NewPing library go to;
Scroll down to the download section and download the latest version of the library. This will be in Zip format. Go into Arduino IDE and use the menu selections;
Sketch -> Include Library -> Add .Zip Library
Select the zip file that you just downloaded. The NewPing library will now install and you will be able to use it in any Arduno project by importing it into the project.
Uploading Code
Copy and paste the below code into Arduino IDE and upload to the micro-controller by pressing the upload button within Arduino IDE.
Code Explanation
The above code takes a new measurement every 50mS and prints it via the serial port. I have included a timing loop in the code so we can see how long it takes for each measurement. You will notice that it can take up to 14mS per measurement, this means that your code can’t do anything for that 14mS as it is blocked. If you were to use multiple sensors this problem will be exacerbated causing your project to respond in sub-optimal ways.
To avoid this I would recommend limiting the time between measurements; so for instance instead of taking a measurement every code iteration you should take a measurement every 100mS or so giving the project a refresh rate of 10hz. If you are to use multiple sensors I would suggest taking measurements every 250mS to keep the code responsive or to use another micro-controller to interface with the HC-SR04 sensors.
These senors can be configured to use 2 pins (one for echo and one for trig) or one pin. The above example uses one pin as this does not affect performance and frees up an extra pin on your Arduino.
You can buy these sensors with a mounting bracket from our E-Bay shop.